11 Strategies To Completely Redesign Your French Door Frame Repair


How to Repair a French Door Frame
French door frames are a popular design element for homes. They come in various styles, such as real-divided lites or simulated divided.
The effects of moisture damage can cause wood to shrink and expand. This could cause doors to become stuck or prevent them latching correctly.
This problem can often be resolved by tightening the hinge screws or adding shims in order to increase the jamb's width.
Hinges
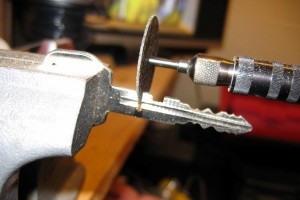
As doors and frames go through a lot of wear and tear, they may become damaged. Cosmetic damage like dents and gouges are easily fixed however structural damage may require the removal and replacement of parts of the frame. This is usually best left to a professional unless you've had experience with carpentry or hire someone else to do it for you.
French doors can have problems closing and opening due to misalignment, or wear and tear. These can be caused by hinges or a poor installation. It is recommended to tighten the hinges when they are loose. This will allow you to easily open and close the door.
You can also spray silicone on the hinges to aid them in their move. If this fails, try removal of the hinge pin, and then using a shim that has been cut to make room. Then, you can attach the hinges to the door frame using new screws that are larger than the ones originally used.
Another common problem is that the latch is seized, so you will be able to lubricate the latch with some silicone spray or take it off it completely and clean the area surrounding the latch and latch hole using a wire brush. You can also reposition the latch by loosening it using a wrench and then putting it back into its original position.
You should apply DPC strips to the rough opening as well as the frame prior to attempting to widen the door. This will stop moisture from entering the frame and causing damage to brickwork of your home.
It might also be difficult to open some doors because of a misalignment in the hinges and latches or because the latch was installed incorrectly. This is a good opportunity to consider replacing the latch and installing it properly. This will not only resolve the issue at hand, but also prevent future issues with the latch.
Jambs
The jamb for the door is a vertical part of a frame that is used to fix the door. It is crucial to the structural integrity of your home and ensures that your door hangs correctly to allow it to be closed and opened easily. The door jambs are also important to ensure the security and energy efficiency of your house.
If your door jamb is rotted, you'll need to replace it. First, you must remove the damaged portion of the door jamb. Dry-fit the new piece of wood to ensure it is fit to the frame opening and the grain runs the same direction as the existing piece. Avoid pressure-treated wood as it will warp and twist after drying. Use a hammer with an attachment set to fix the new wood to the current jamb. Then use wood glue to put the adhesive in place and hit two nails on the top and bottom of the lumber to reinforce it.
After the repair is completed, you can sand the wood, and then apply spackling compound to fill the small holes. Fill with epoxy to cover more extensive gouges, nicks, and dents. It is easy to sand once it has set.
Before you start, take a good look at the damage to your door jamb, and then determine the extent of the damage is. It is essential to know whether the damage is limited to a single area or if there are several rotted areas that need to be replaced.
If the rotted area is small, you might be able to remove any loose wood and then apply epoxy wood filler to the divot. If the area that is rotten larger it is required to replace the damaged portion of the door jamb.
You can purchase repair kits for door jambs from many home improvement stores that contain pre-cut door jamb pieces that can be used as a quick and simple solution to the damaged frame. These kits are reasonably priced and come with everything you require to complete the task quickly. You can also purchase an item that contains a special chemical that will convert your soft, old wood into solid, hard wood. This way, you won't need to replace the entire frame.
Caulking
The first step in caulking is to clean any old caulk from the gap or joint. This can be accomplished using the help of a utility knife or scraper. After the old caulk is removed it is advisable to wipe the joint with the aid of rubbing alcohol or disinfectant spray. This will ensure that the area is clean and free of dirt, dust or grease that could hinder the caulking job.
It is not always necessary to apply a primer to help the caulk stick. It is important to select the right caulk for the job prior to applying it. When choosing the right caulk, factors like durability and flexibility as well as resistance to mildew and mold are important. It is also a good idea to select a caulk that can be painted.
After selecting the caulk that is suitable and securing the area, it must be cleaned thoroughly. This can be done with an alcohol soaked rag or a cleaner that is available over the counter. It is essential to dry the area after cleaning the surface. Moisture can hinder caulking adhesion and cause sealants to fail prematurely.
When the surface is finished, masking tape can be applied to areas near the joint or in gaps where the caulk that was applied won't show. This will enhance the look of the final product and ensure that a neat, precise line is created. Next, the tip of the caulk tube should be cut at a 45-degree angle to create an opening that is the right size for the purpose. Then, the caulk can be loaded into a caulking gun, and then pushed through the tube with the plunger until it is ready to be dispensed.
Apply the caulk in a smooth, sweeping motion. Stopping to smooth as you go. Be sure to fill the entire gap or joint, and leave no gaps or ridges. Repair My Windows And Doors is possible to paint the caulk once it has dried completely. Paint the exterior if you haven't already.
Paint
There are many ways to repair the flaking paint or discoloration on your french door frames. You can take them off and place them on two sawhorses (be sure not to scratch the trim or wall behind it). You can use a hand plane to eliminate any bumps. Then sand and prime it.
You can also match the color of the paint that you have already applied. Make sure to apply several thin coats, and allow each to fully dry before applying the next.
Moisture is the primary cause of door frame rot and decay. Wood fibers absorb and shed water in response to seasonal or daily changes in relative humidity, which causes it to expand or shrink. This movement can loosen the paint film or even remove it from the wood, leading to peeling and blistering.